Markdown is becoming more popular as a minimalistic format for a simple markup document. It is simpler to use than having to type out the syntax of an HTML document and still appear neat and aesthetically appealing. For notes takers, markdown helps to simplify the task of writing up an overview well-designed note outlook and just learning some basics are needed for that.
Online markdown editors for note-taking
StackEdit – Recommended
HackMD – Basic for collaboration
Mac apps markdown editors for note-taking
Typora – Recommended: Beautiful and intuitive
Boostnote – Basic and working
Mac coding editor apps as Markdown editor for note-taking
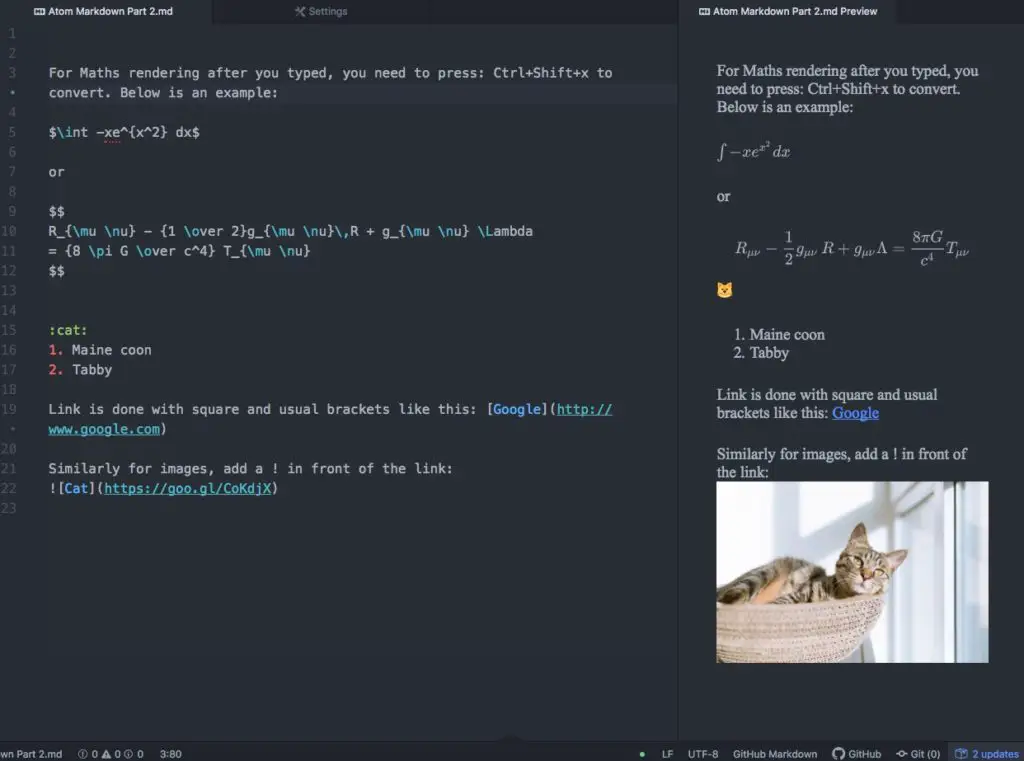
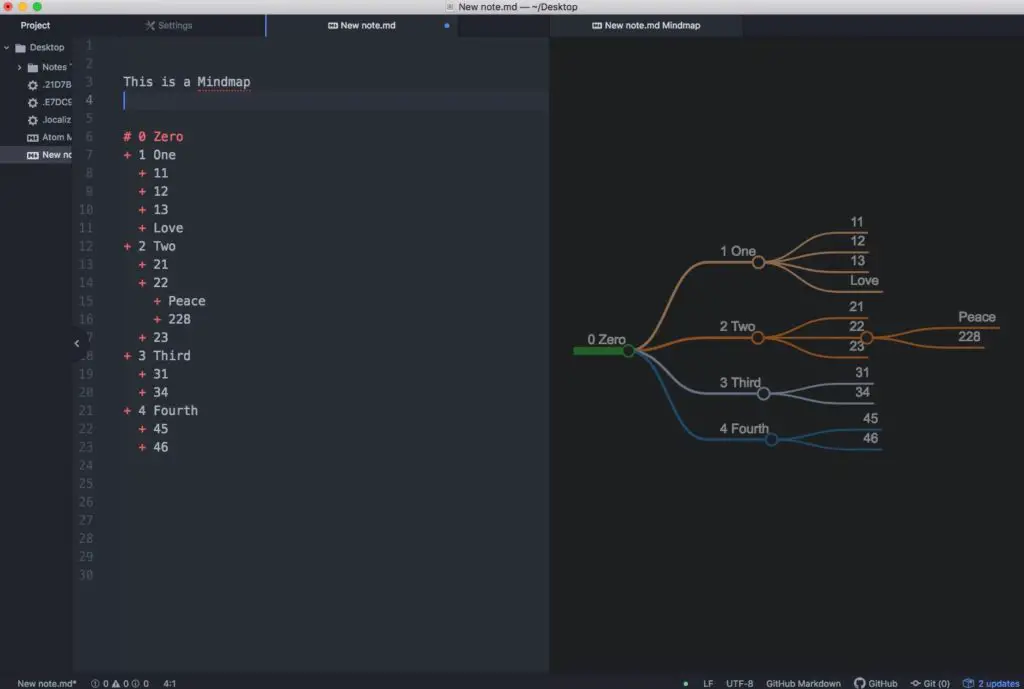
Atom – Usable with markdown preview plus and mindmap packages
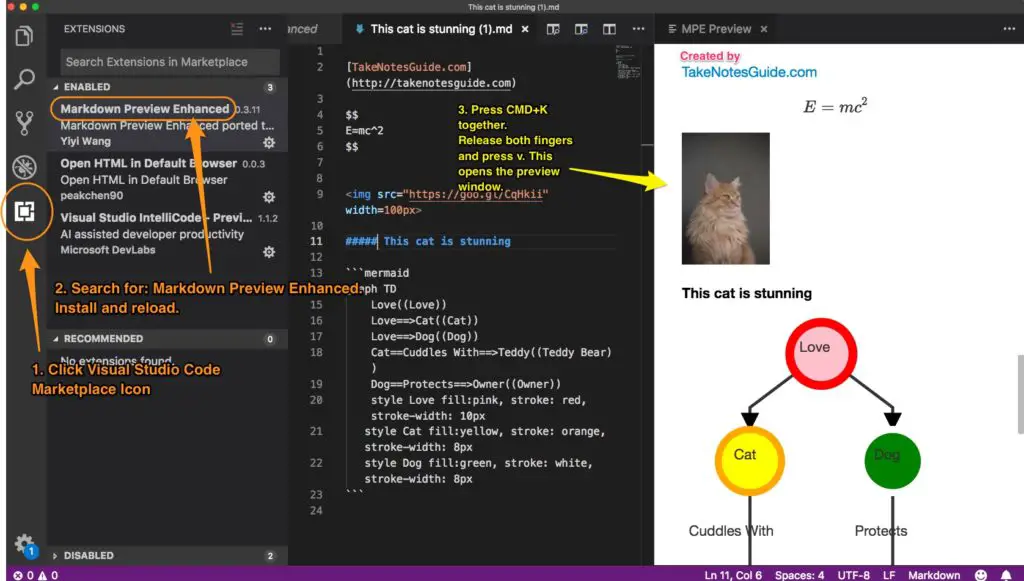
Visual Studio Code – Works with Markdown Preview Enhanced
Which solution would you prefer? please read on for more screenshots and analysis…
StackEdit
StackEdit is a comprehensive online markdown editor that also supports offline by saving files in the browser. I tested going offline and still could retrieve and edit the file as usual with live preview while sync is disabled. Just go to Stackedit.io and click start writing to continue where you last left off.
StackEdit probably has all the features you may need
Online and offline support and workspaces
Examples and formatting menu
Publishing options to the various cloud or blogging platforms
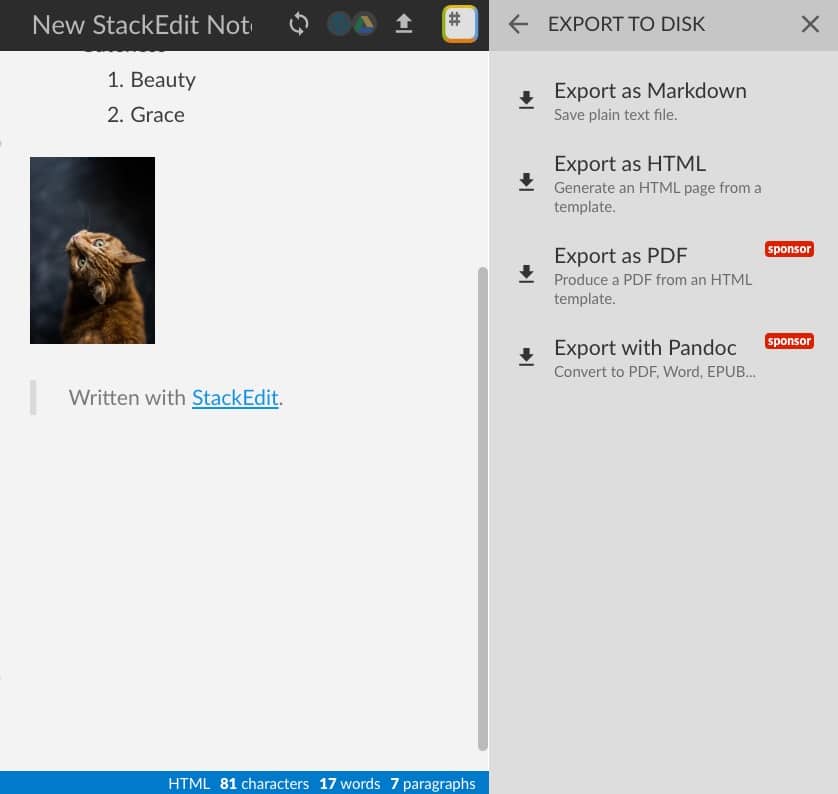
Import and export to disk options
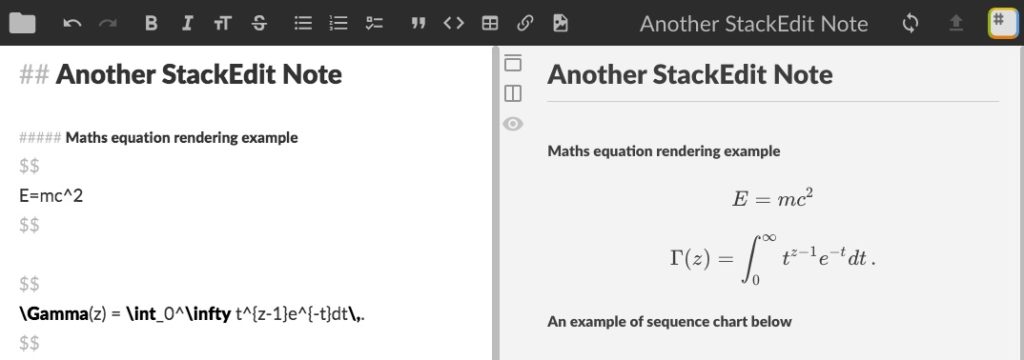
Latex(Maths rendering)
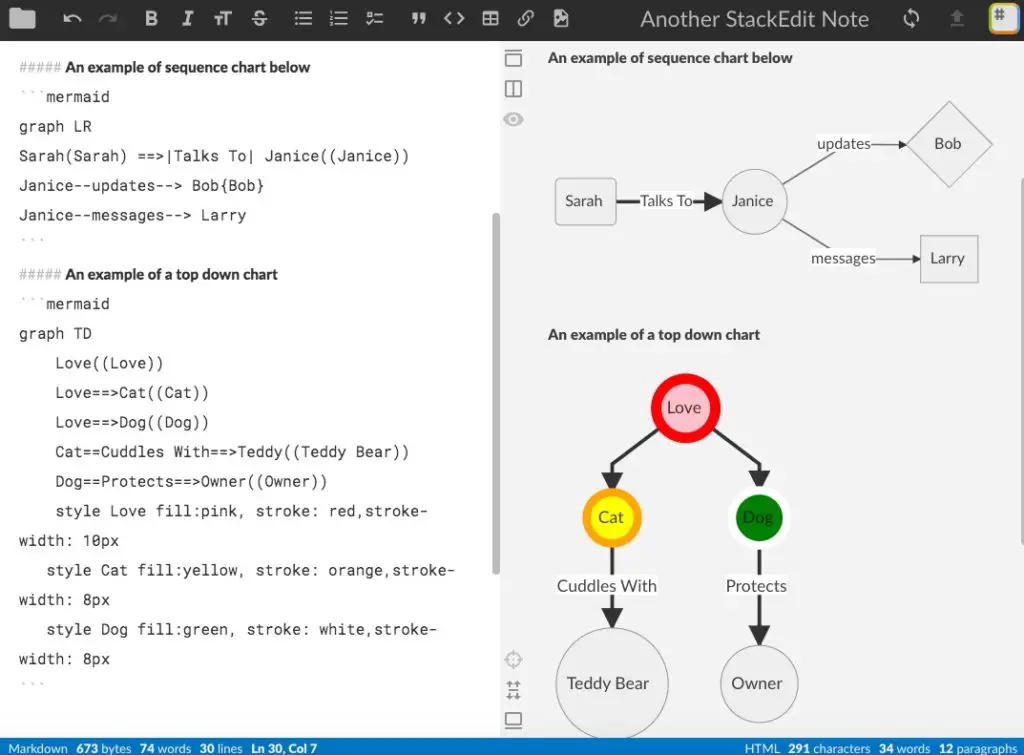
UML diagrams
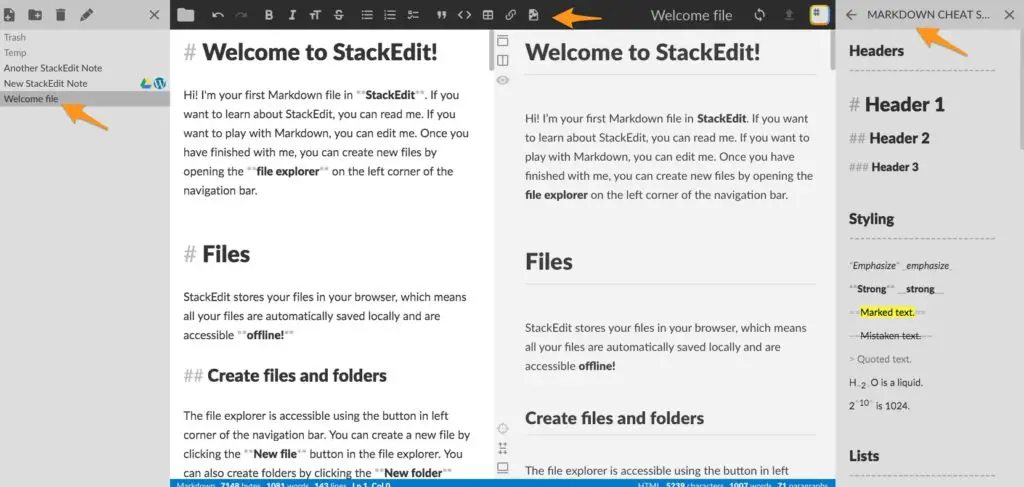
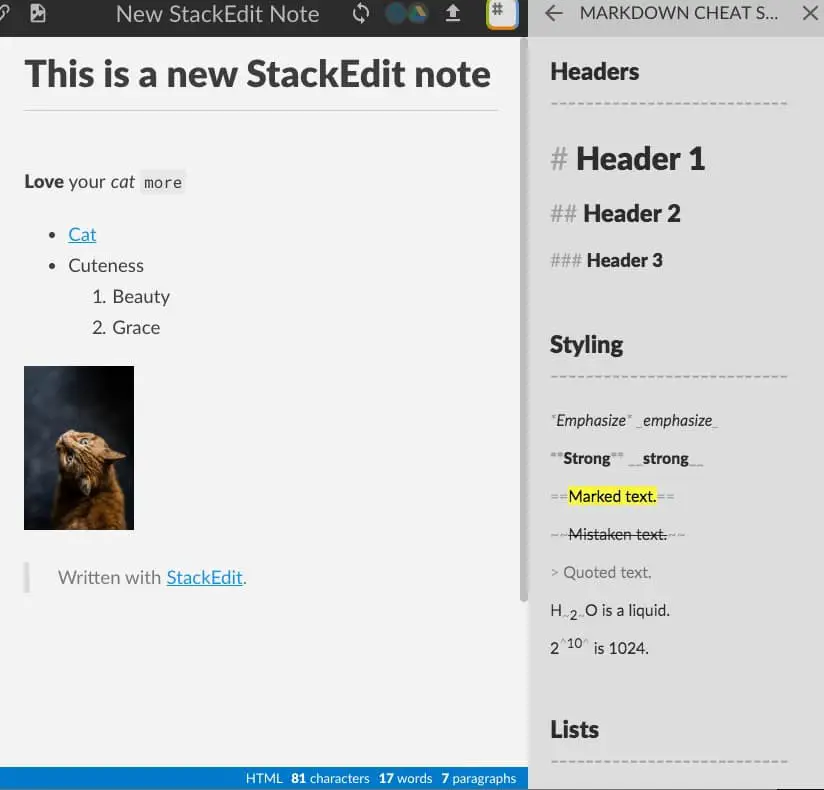
StackEdit makes it easy to learn and write markdown documents
You have there Welcome file on the left, the menu formatting tools above and Markdown cheatsheet on the right to guide you.
For beginners the Markdown cheatsheet is an easy way to follow and learn.
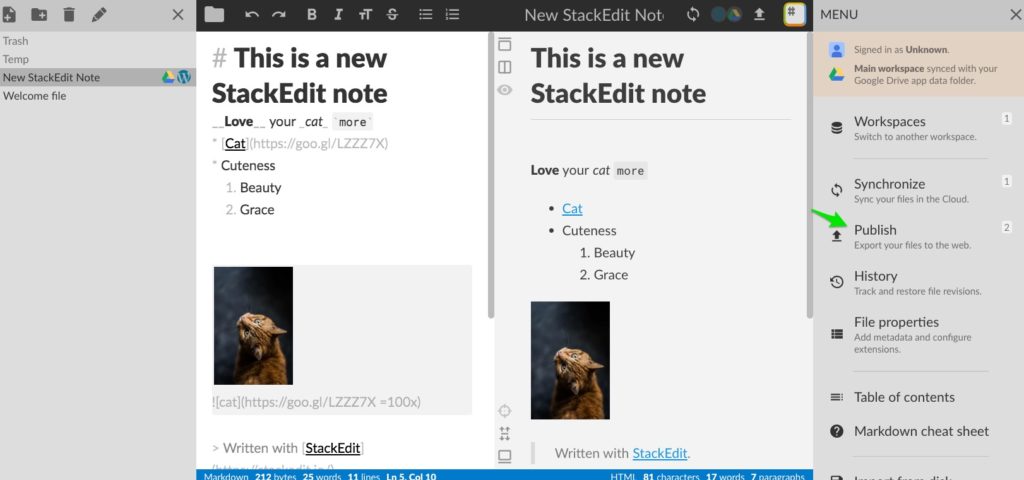
When you are ready, click publish to your configured cloud or blog accounts. You can choose from Blogger, Dropbox, Google Drive, Github, WordPress, and others.
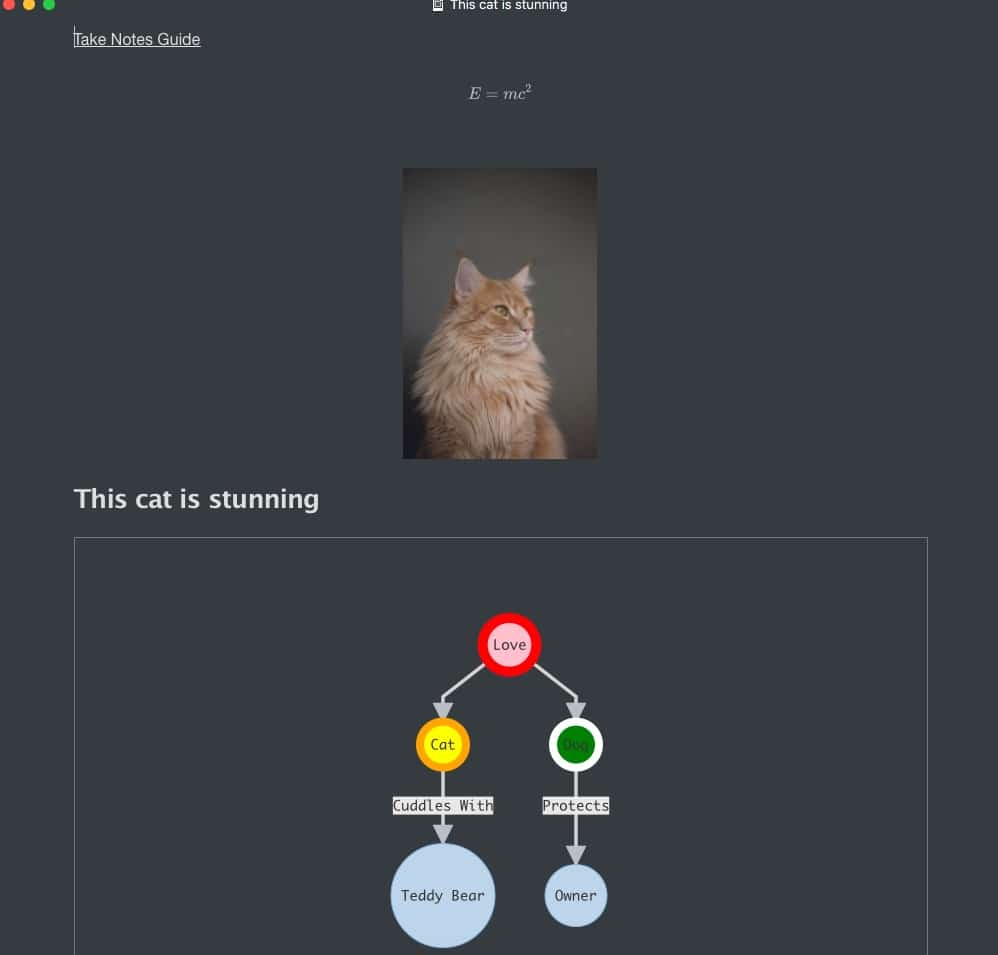
You can render Maths equations (LaTeX) on StackEdit.
Or you can also use it to draw diagrams similar to mind mapping, in left to right or top down or more, learn more here.
To start, activate by enclosing the diagram logic within “`mermaid … “`. Please follow through the examples above if you wish to learn this. I have attached the markdown file here for your reference.
StackEdit Export Options.
HackMD
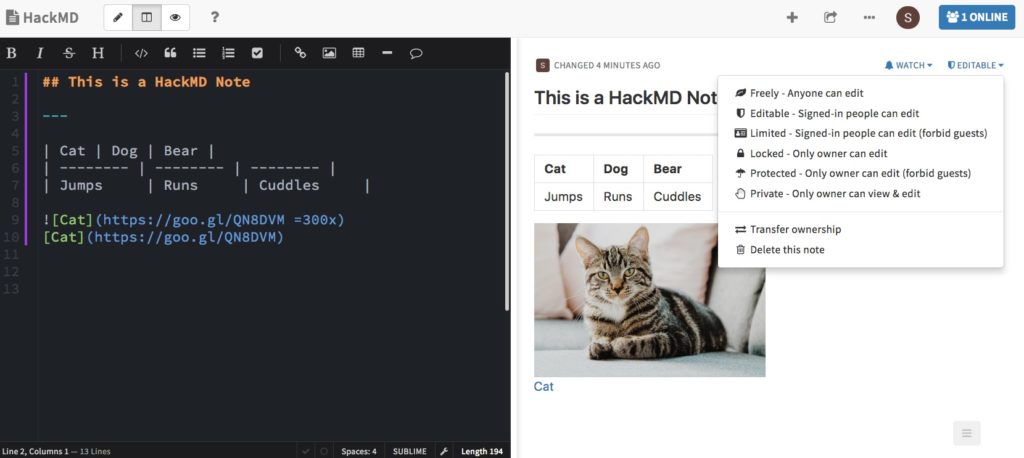
HackMD is a simpler online markdown editor with basic features. The strength of HackMD is in collaboration with different options on how you want to share this note. There is also an option to export to Dropbox, Google Drive, and Gist. Also, there is an option to go into Slide Mode and you can easily present your note in a powerpoint slide style.
Typora
Typora is one or the most beautiful markdown editor I have seen. This is the only editor I know that displays live preview in the same frame as you type away. The Mac App design is simply visually appealing. It can also support Maths rendering and UML diagrams. It does not have cloud support but there are many options for export such as HTML, PDF, image and more. This is a gem Mac notes takers can keep. It is still free in Beta.
Beauty of Markdown in Typora. The Markdown document is here.
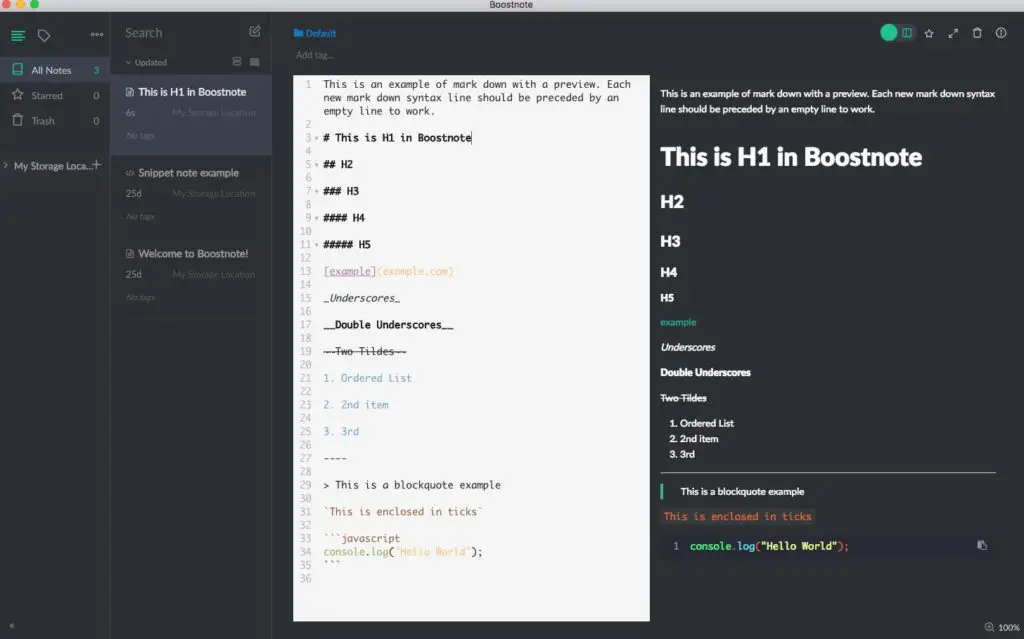
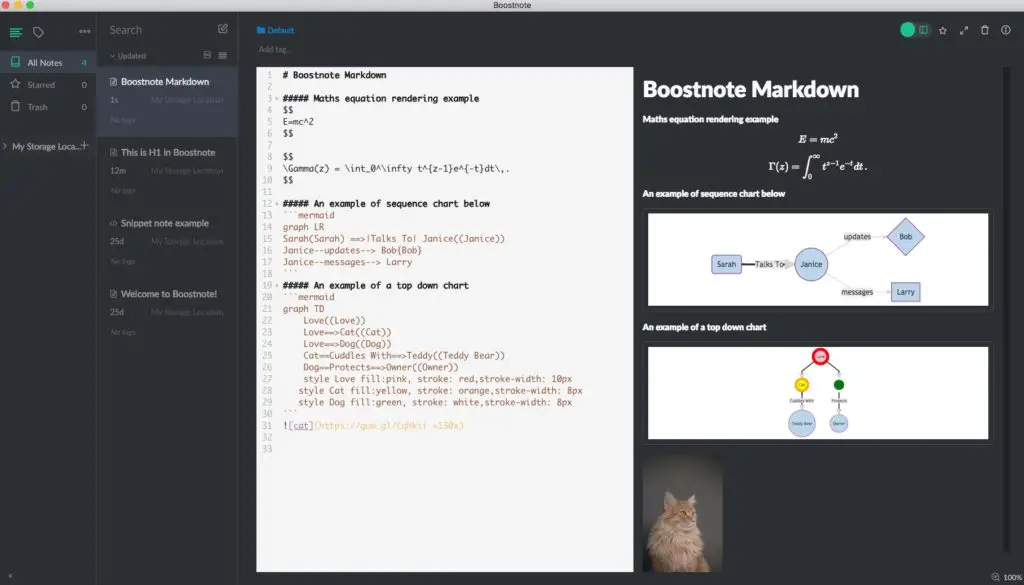
Boostnote
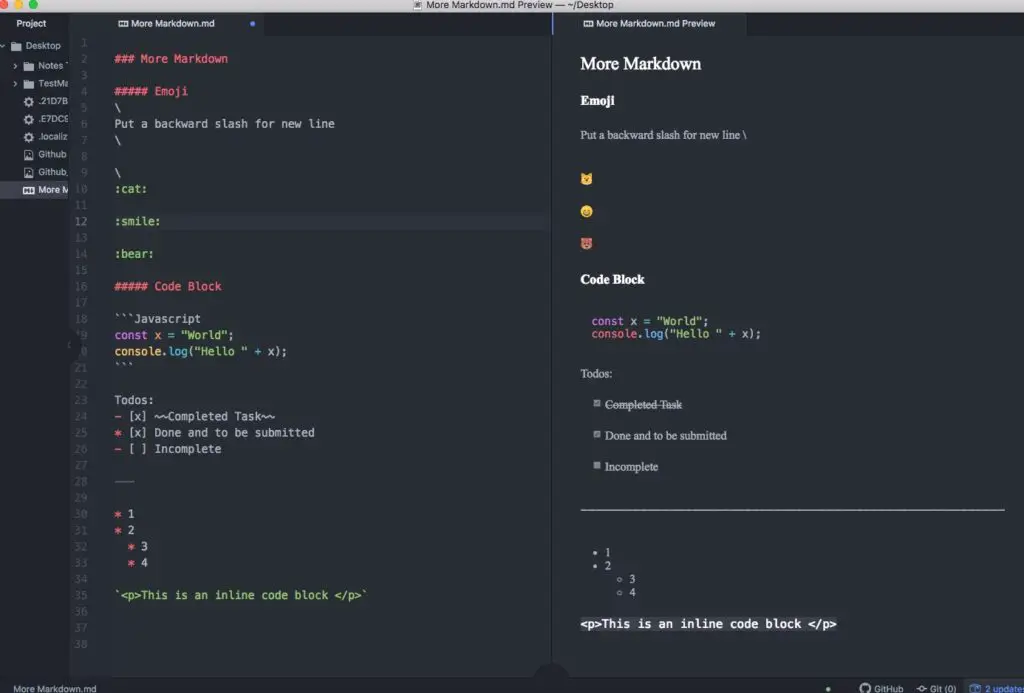
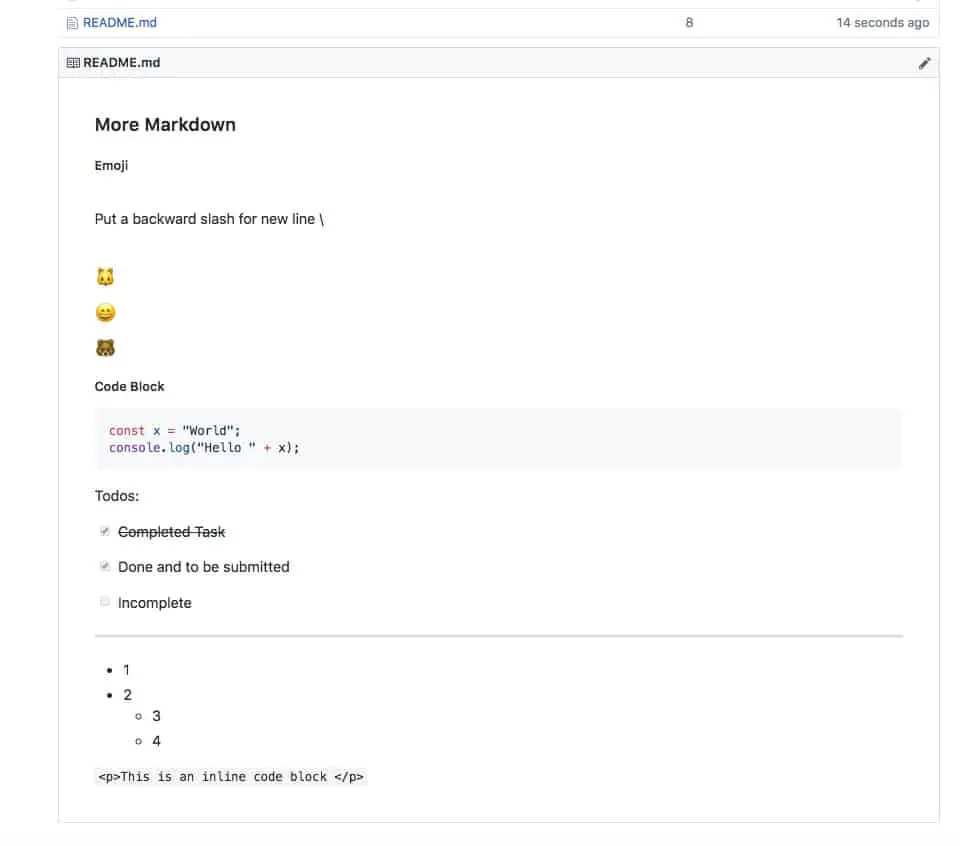
Boostnote is an open-source cross-platform markdown editor. There is an option to publish to a WordPress blog. LaTeX and UML diagrams are working.
Examples with Emoji, new line, code blocks, checkboxes and inline-block. The Markdown document can be accessed here.
Conclusion
For online with offline access, I recommend and prefer StackEdit for scalability and its features. Please remember to upload or publish your notes to backup. HackMD is basic and collaboration with others is possible.
For the Mac App, Typora is the clear winner. Boostnote is also a viable markdown note-taking solution but Typora not only looks good but has live preview once the syntax is complete.
For Mac code editor as Markdown editors, for basic Markdown usage, both are working. Atom has a better preview markdown outlook in my opinion and in addition, has a markdown mindmap package that mind mapping users may prefer for note-taking purposes. However, the UML diagram is not supported in Markdown Preview Plus. On the other hand, Visual Studio Code Markdown preview enhanced works fine for markdowns, Maths and UML. But visually may not be as appealing as Atom. Both have their advantages.
The overall ranking of these Markdown editors for note-taking or otherwise in my opinion:
Typora is best in terms of beauty with live preview on the same page
StackEdit comes in second with its comprehensive features
Third place is shared between Atom and Visual Studio Code
Please remember not to get carried away with Markdown, it is just a simple tool to help us take notes down. Backup your notes to a cloud or drive. I would prefer syncing markdown notes directly into Evernote but I did not find a recommendable free solution for that. I hope this helps, good luck and be kind to others.
Related Questions
Markdown support for Evernote?
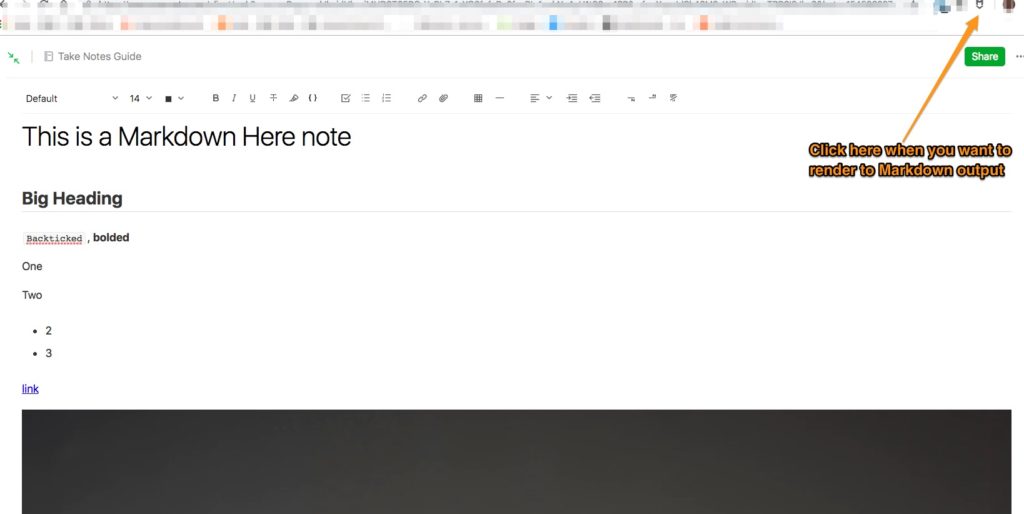
Markdown Here – It is free and created for writing emails with Markdown i.e. Gmail. However, you can use basic Markdown commands on the Evernote Web as well with its Chrome extension. But please note it is not a robust solution. Maths rendering, image resizing, and UML diagrams may not work. And one may have to keep turning on and off the rendering by clicking the chrome extension icon to avoid unsaved changes.
A Markdown Here note in Evernote.
More free markdown alternatives
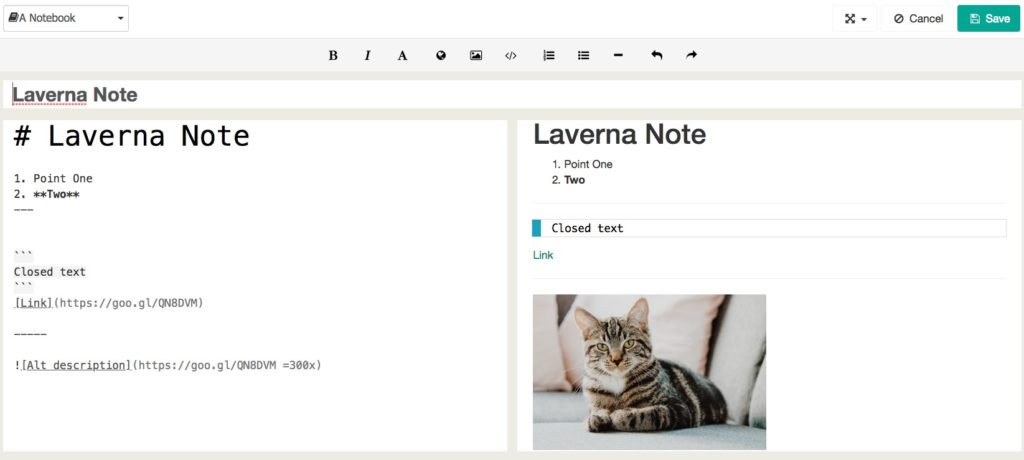
Laverna and Dillinger are also basic online markdown editors. Go for sustainability instead. It is less probable for smaller sites such as HackMD, Laverna or Dillinger to survive longer than popular or more professional ones.
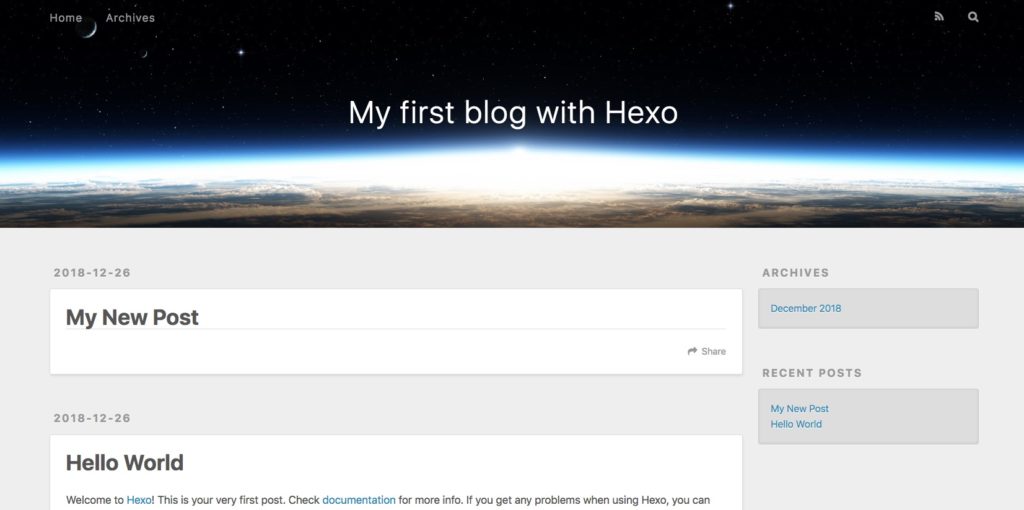
Markdown for blogging
Hexo – Install and run your blog framework with Markdown support. There is a learning curve involved here and it may be over the top for just a note-taking purpose
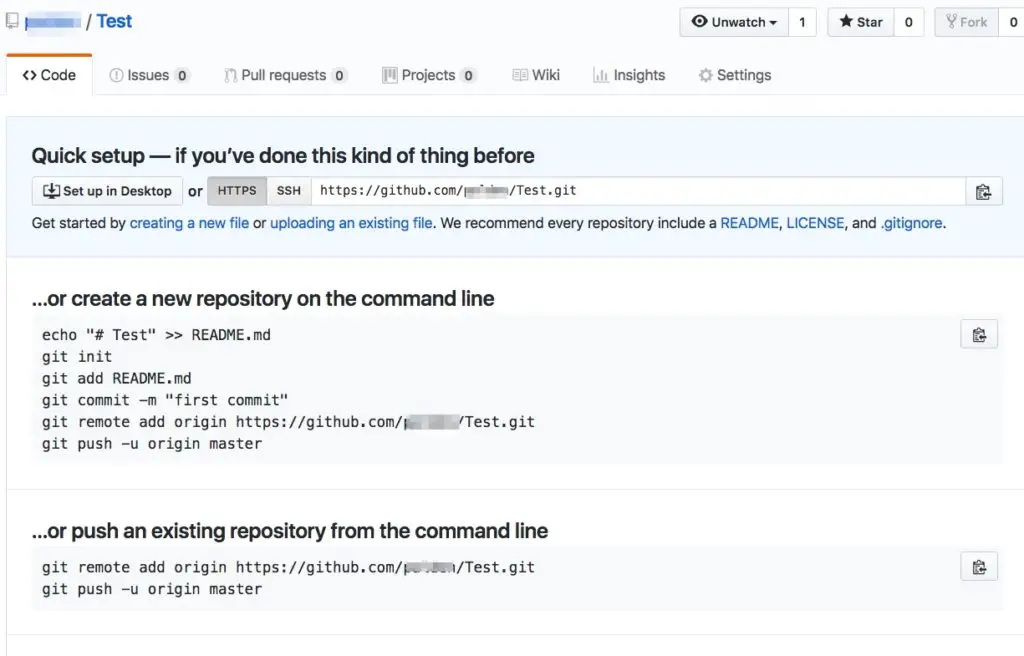
Jekyll – From text with markdown support to sites and blog on Github pages for free hosting.
On your Mac, create a new directory on Desktop i.e. Test. Put a markdown document named README.md into it.
Start a terminal session (from spotlight search and CMD+ if the screen is too small), go into the created directory i.e. Type: cd Desktop/Test. Press Enter. (pwd to know your current directory. cd .. to back out of a directory. Tab can auto-complete a long directory or file name.)
In the new directory from the terminal, type and press enter: git init
Tip: Any further changes made to the same directory can be updated to Github with 2 commands without the brackets [git commit -am ‘a commit comment’] and then [git push -u origin master]